原来是密码不对
配置下masterauth即可
原来是密码不对
配置下masterauth即可
卸载分区
umount /dev/vg1/lvMysql
e2fsck -f /dev/vg1/lvMysql
resize2fs /dev/vg1/lvMysql
挂载分区
mount /dev/vg1/lvMysql /mnt/mysql
CouchDB PHP客户端:https://github.com/sn01615/couchdb-client
创建数据库
curl -X PUT http://127.0.0.1:5984/test
获取数据库列表
curl -X GET http://127.0.0.1:5984/_all_dbs
创建数据库
curl -vX PUT http://127.0.0.1:5984/albums-backup
删除数据库
curl -vX DELETE http://127.0.0.1:5984/albums-backup
保存一条数据
curl -X PUT http://127.0.0.1:5984/test/6e1295ed6c29495e54cc05947f18c8af -d ‘{“title”:”There is Nothing Left to Lose”,”artist”:”Foo Fighters”}’
获取一条数据
curl -X GET http://127.0.0.1:5984/test/6e1295ed6c29495e54cc05947f18c8af
创建用户名密码
HOST=”http://127.0.0.1:5984″
curl -X PUT $HOST/_config/admins/username -d ‘”password”‘
要在配置文件里设置密码
使用用户名密码获取数据
HOST=”http://username:password@127.0.0.1:5984″
curl -X GET $HOST/test/6e1295ed6c29495e54cc05947f18c8af
连接到master上执行
pt-online-schema-change --user=root --password=xxxxx--host=master D=doufu,t=user_comment --execute --alter "ADD COLUMN content_image text NULL COMMENT '' AFTER like_uids" --nocheck-replication-filters
选项说明:
–user=root 用户名
–password=xxxxx 密码
–host=master 主机ip或域名
D=doufu,t=user_comment 数据库名和表明
–execute 不加此参数不会真的执行
–alter “ADD COLUMN content_image text NULL COMMENT ” AFTER like_uids” 需要执行的修改操作
–nocheck-replication-filters 如果有主从结构必须加此参数才能运行, 必须在主库上执行
centos7 php7.1安装pecl install v8js扩展失败
已经安装了v8-devel还是失败,怎么办?
yum install v8-devel
1. 下载、解压
wget http://mirrors.hust.edu.cn/apache/lucene/solr/6.4.1/solr-6.4.1.tgz

tar zxf solr-6.4.1.tgz
2. 安装JAVA运行环境
yum install java-1.8.0-openjdk
==========solr 标准安装方法==============
# 准备数据目录和安装目录
# 数据存放目录
mkdir /mnt/www/solr
# 软件安装目录
mkdir /usr/local/solr
#安装软件和服务
./solr-6.4.1/bin/install_solr_service.sh solr-6.4.1.tgz -d /mnt/www/solr -i /usr/local/solr
# 创建core
su - solr -c "/usr/local/solr/solr/bin/solr create -c doufu"
# 启动停止方法(centos 7)
# 先停止solr
su - solr -c "/usr/local/solr/solr/bin/solr stop"
# 启动solr
systemctl restart solr
# 查看solr运行状态
systemctl status solr
# centos6 可用service控制
service solr start/stop/restart
# 访问Web控制台
http://youip:8983/
# 下一步:
# misc:
[root@web4 solr]# bin/solr --help
Usage: solr COMMAND OPTIONS
where COMMAND is one of: start, stop, restart, status, healthcheck, create, create_core, create_collection, delete, version, zk
Standalone server example (start Solr running in the background on port 8984):
./solr start -p 8984
SolrCloud example (start Solr running in SolrCloud mode using localhost:2181 to connect to Zookeeper, with 1g max heap size and remote Java debug options enabled):
./solr start -c -m 1g -z localhost:2181 -a “-Xdebug -Xrunjdwp:transport=dt_socket,server=y,suspend=n,address=1044”
Pass -help after any COMMAND to see command-specific usage information,
such as: ./solr start -help or ./solr stop -help
ln -s /var/lib/mysql/mysql.sock /tmp/mysql.sock
SNMP : 简单网络管理协议, 典型的应用就是监控服务器的状态. 例如, 监控宝使用 SNMP 协议监控服务器的状态.
下面介绍 SNMP 服务的安装配置. 官网: http://www.net-snmp.org/
|
1
2
3
4
5
6
7
8
|
yum install net–snmp
#设置开机启动
systemctl enable snmpd
systemctl start snmpd
#查看当前版本, 这里是5.7.2
snmpd –v
|
SNMP支持不同的验证机制,这取决于不同的SNMP协议版本,监控宝目前支持v2c和v3两个版本, 我们使用 v3.
首先停止 snmp 服务
|
1
|
systemctl stop snmpd
|
编辑配置文件
|
1
|
nano /etc/snmp/snmpd.conf
|
在文件末尾添加如下内容
|
1
2
3
4
5
|
#启用只读 v3 用户
rouser user1 auth
#创建用户
createUser user1 MD5 password
|
配置好以后启动服务
|
1
|
systemctl start snmpd
|
启动后 snmp 会检测配置文件, 当检查到有 createUser 参数时, 会创建新用户或替换已经存在的用户, 然后将加密密码保存在 /var/lib/net-snmp/snmpd.conf 文件中
, 再从配置文件中删除这行.
因此要创建新用户或更改密码时只需要停止服务, 在配置文件中加入 createUser 参数, 再次启动服务即可.
添加防火墙规则, 放行 udp 161 端口
|
1
|
nano /etc/sysconfig/iptables
|
将下面的语句放到合适的位置
|
1
|
–A INPUT –p udp –m udp —dport 161 –j ACCEPT
|
保存, 重启 iptables.
|
1
|
systemctl restart iptables
|
至此, snmp 服务配置完成.
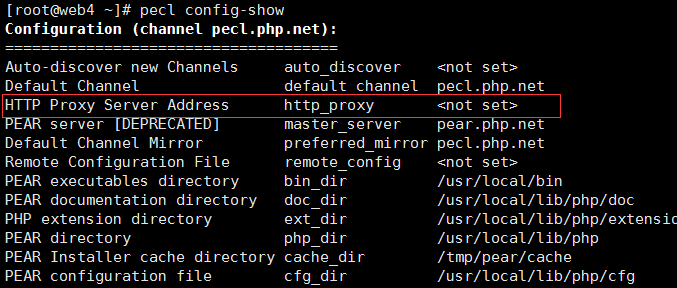
[root@web4 ~]# pecl config-set http_proxy http://test:1080
config-set (http_proxy, http://test:1080, user) failed, channel pecl.php.net
尝试失败
查找资料https://blog.flowl.info/2015/peclpear-behind-proxy-how-to/
换成pear成功。。。。
[root@web4 ~]# pear config-set http_proxy http://test:1080
config-set succeeded
这个应该是个bug pecl的代理要使用pear来设置。。。